Showing posts with label Hair Care. Show all posts

Wednesday, October 17, 2012

Three Month Length Check


Two Inches of Growth! Go me!

For the next three months I plan on continuing my wash n gos. I also will be doing twist outs and buns. Oh...and I will only be straightening my hair for Thanksgiving and Christmas.

I would like to incorporate other methods to help with my hair growth. I plan on experimenting with black tea rinses (which are known to be superb for minimizing hair shedding). I would also like to to try Aloe Vera Juice to help with detangling (a nightmare at times!) 


Wednesday, October 3, 2012

Natural Hair Dilemma...

Why does my hair have three different textures???

The top of my hair has a very loose curl pattern. The front-left side of my hair is little loose and always looks damn near straight on the ends. And the front-right and back of my hair is coily. I prefer the latter. But blending it all in makes it a styling nightmare. 

It's not heat damage. This loose texture is from root to tip. It's just the way my hair grows. It's so bad that I have to put a rod on the braid in the front of my hair because it barely curls on the end.

I haven't been rodding the left side because the right side curls with no problem and I have a dilemma in my head where I have to do for the right side of my body whatever I do for the left and vice versa. 
Kind of like how you can't wash one hand without washing the other. 

I've done some research but Youtube videos and forums suggest curly gals to twist the hair around your fingers. Let me tell you, that doesn't work! It only makes it worse! 


I was thinking about cutting the left side so that appears to be the same length as the right side.  But when my hair is stretched they are the same exact length.

I know I can't be the only one out there with a variety of hair textures!! 

Left side - look at those straight ends!

Right side - hair love!

Back of my hair - *drool* (if only all my hair looked like this!)
Written by Danielle Elle

Google

Sunday, September 23, 2012

My First YouTube Video!!

I have always said that I am better writing with my hands to express myself than speaking with my mouth. That's why I am a blogger rather than a vlogger. But I have been thinking of doing a couple of hair style and hair guide videos because sometimes the video visual is better than reading the description. It's like reading the book vs. going to see the movie. Some prefer one over the other!

Without further ado, here is my very first YouTube video. I was nervous. I hope I become less camera shy in my next video. And please excuse my appearance!  The video was very impromptu!

Friday, September 7, 2012

Nupur Mehndi

Stopped by the store that I usually go to for my Henna, Castor Oil, Almond Oil..and while browsing the aisles I came across Nupur Mehndi. I do not consider myself to be following a strict Ayurvedic Hair Regimen, but I use herbs and oils like Neem, Alma, and Henna in my deep conditioners occasionally. The Nupur stood out to me because A. The powder is mixed with nine herbs that essentially benefit the hair and B. A friend of mine mentioned using a powder like this and had fabulous results.

The product description on Godrej Nupur's website reads:

Nupur brings to you the best quality Rajasthani Mehendi with 9 carefully chosen natural herbs. The ingredients are added in perfect proportions to give your hair the fabulous shiny & silky feel that you desire every single day. 
Following are herbs used in Godrej Nupur Mehendi with their benefits.

  • Brahmi - Promotes hair growth.
  • Shikakai - Leaves hair clean & shining.
  • Aloe Vera - Maoisturises hair & makes it silky.
  • Methi - Conditions, nourishes & revitalises hair.
  • Bhringraj - Makes hair luxuriant.
  • Amla - Darkens hair colours, adds shine & luster.
  • Neem - Fights scalp infection & prevents dandruff.
  • Hibiscus - Rejuvenates hair making it shiny & silky.
  • Jatamansi - Prevents graying of hair.

 The company recommends mixing the product this way:

Soak Nupur Mehendi in water for 2-3 hours. You may add curd/oil for extra softness. Apply paste evenly from root to tip of the hair. Leave for 3-4 hours. Rince thoroughly with water.

Now...I'm not one for patience. So of course I did not soak the Nupur Mehndi in water for 2-3 hours. Let's try...2-3 minutes? It was late and I didn't feel like waiting until the morning to try this product. Next time I will be sure to soak it for 2-3 hours though.

I added 1 cup of water, 1/4 cup of Coconut Oil and 1 cup Aussie Moist Conditioner to this product.
I loved the results! I cowashed the product out of my hair with Suave Conditioner and followed up with a Deep Conditioner mix. I noticed far less breakage so far. My hair is much softer and stronger as a result of this product. I will be using this again before the month ends.

Product Grade: A+ 

Sidebar: I did not realize that the product would stain my hands (Mehndi=Henna). Doh! I'm walking around with orange fingers/nails as a result. Lesson learned. 

Friday, August 31, 2012

Revisiting Shea Moisture Curl Enhancing Smoothie


Lately I have been all ra-ra about my newest love of the Wash n' Go. I thought I had a staple product, but my bottle of Tresemmé Naturals has been replaced! I have found that I get more moisture from using SheaMoisture Curl Enhancing Smoothie. This product gives me "cotton candy" curls all day long. I'm even able to stretch my wash n' go out for an extra day or two (with a pony tail or banana clip).

Thursday, August 30, 2012

Finger Detangling

Yes, I've done it. I've ditched the comb. Kicked her to the curb.

The (re)introduction of the wash n go into my hair world has inspired me to let go of the comb. I began finger detangling this summer and have achieved great results with this method. I have noticed far less breakage. Instead of dragging/forcing/pulling a comb through my hair, I am able to separate the tangles in my hair with my fingers. This technique is far more gentle on my hair strands.

I always detangle in the shower. Many people detangle their hair when dry and I have yet to try this alternative. For now, finger detangling wet hair has been working extremely well for me. While in the shower, I make sure that my hair is completely saturated with conditioner. As I am under the shower head, I begin to detangle my hair in sections by gently combing my fingers through my hair. When I reach an area that is tangled, I gently separate the hair. Once I detangle a section I twist it so that it is not in the way of me tackling the next section of hair.

It is important to find a conditioner that has enough "slip" (slipperiness). It is also important to take your time while doing this! You do not want to cause more damage while finger detangling then you would while using a comb or brush.

I have found the following conditioners to provide great slip for my finger detangling:

Herbal Essences Hello Hydration, Aussie 3 minute miracle, Aussie Moist, Tresemme Naturals.

Also, diluted Apple Cider Vinegar is another great product that helps with detangling natural hair.


Thursday, August 9, 2012

Loc Soc Review


(product details are at the bottom highlighted in pink, just incase you want to skip my long drawn out story lol)

Have you ever lost something, whether in your house, apartment, office, or even your car...and search and search and search and still can't find it? Well, welcome to the story of my life!

Lost item #45327: Loc Soc

In June of this year, I went to an annual African Festival in my city. I love attending this festival. The music, the food, the crowd...amazing. I usually purchase my whipped Shea butter tub and check out the other booths that sell jewelry, clothes, artwork, etc. I found a booth ran by a company called "Shades of Color". They were selling a product called the LocSoc. It seemed like an interesting concept, especially with my newfound interest in wash n gos. I figured that I could use it to pineapple my hair. I picked up a black LocSoc and used it that same night.

I have been using it since then!

Unfortunately three nights ago I misplaced it with no idea of where it could've "ran" off to. I searched for bout about 20 minutes with pictures in my mind of where it ought to be....but no luck.

I had an idea. I figured I could cut a stocking and make my own LocSoc.

Bad idea.

Not only was it cutting off my circulation because it was so tight around my fivehead, but it kept rolling further up and up. I pulled it, yanked it, held it...wouldn't stay in place. Finally I said "what the hell" threw my satin bonnet on and went to sleep.

Of course it popped up the next day. Like I was never searching for it.

Now onto why i love this product:


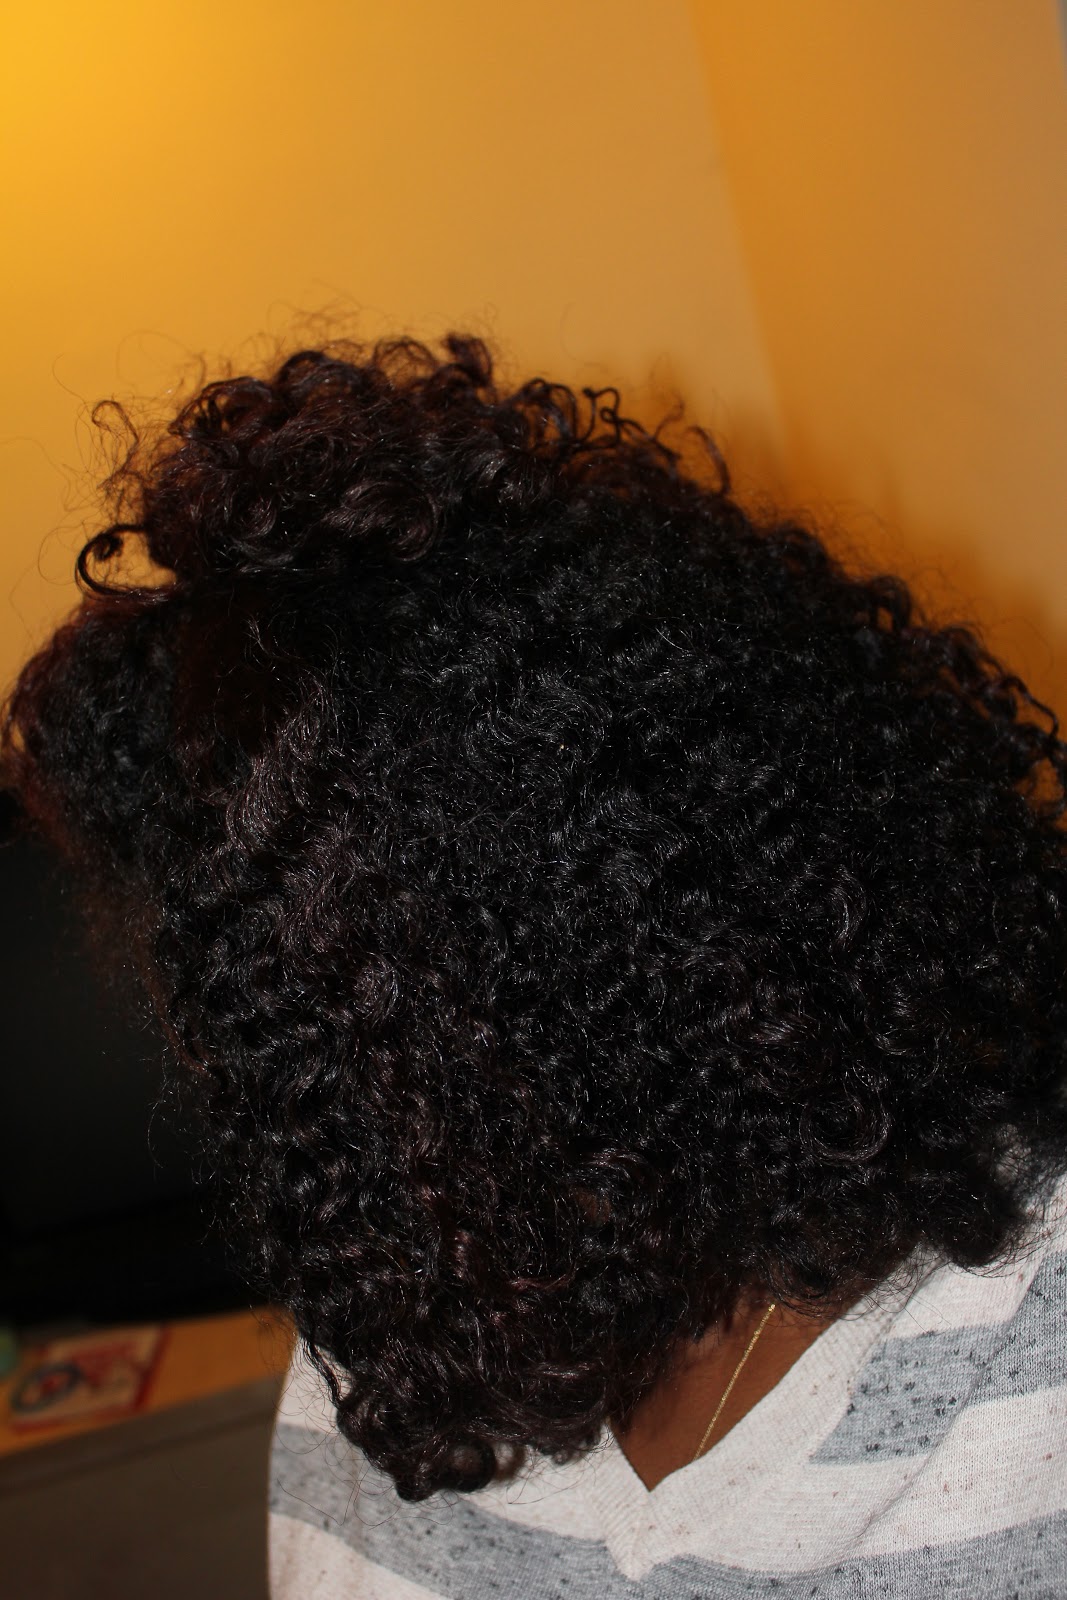
The LocSoc is a hair accessory made of Lycra (very stretchy material. It is very versatile and I have used it to protect my natural hair styles. I have also used it as a headband and as a scarf to lay down my hair after applying gel. It is comfortable, which is important for me especially for sleeping in overnight. I purchased my LocSoc in the color black, but the company has a wide variety of colors, styles, and prints for customers to chose from. My biggest rave about this product is that I have been able to stretch out the amount of days I can wear a wash n go or twist out by using the LocSoc. 

The product is currently sold online: LocSoc Online Store and also at select stores. 

Sunday, June 24, 2012

Summer Style

I have always wanted to achieve a wash n go that would 
a. Look as good dry as it is when it's wet
b. Have definition
c. Allow me to leave my house shamelessly

I think I've found the perfect product combination for my hair to achieve this look.
I have learned to stop being lazy and to apply the product to my hair in sections. My hair is too thick to do anything other than this.

I used Tresemme Naturals, African Pride Oil, and Eco Styler Argan Oil Gel. In sections. And air dried.

This is my hair 12 hours later:


Saturday, June 9, 2012

One Month Update

A month ago I decided that I would make some adjustments to my daily/weekly hair routines that would hopefully lead to healthier and stronger hair.

I listed these adjustments in this post : In My Bag


  • More Deep Conditioning!
  • More Protective Styling!
  • Bare Minimum Amounts of Heat!
  • annnnnnnd
  • 'Baggying' my ends at least 5x a week!


Since then...


  1. I have Deep Conditioned twice using Aubrey Organics GPB Glycogen Protein Balancing Conditioner and Aubrey Organics HoneySuckle Rose.(I should actually be Deep Conditioning weekly...)
  2. I tried a new protective style for one week: Twists. I will be using these again very soon.
  3. I haven't used any heat at all.
  4. And as for baggying my ends...sigh. I really need to stick to that. Fell off a couple of weeks ago. BUT I have been sealing my ends nightly!!


One thing that I have learned during this time is to listen to my hair and what it needs. My hair has different textures. The top of my hair is wavy and the back has more of a coily curly thing going on. And the sides are a distinct mixture of the two. I have found that the back of my hair doesn't seem to retain length as well as the top and sides. The ends of my hair in the back quickly become dry and raggedy (dare I say). I have been making sure to heavily (in terms of comparison) seal this part of my hair. And I have noticed some growth, though I haven't done an official length check. And I have also noticed that it looks and feels better than before. So on that note ladies, definitely listen to what your hair is telling you and adjust accordingly!

Have any of you learned anything about your hair that has helped with your hair health and growth? Share below!!!


Wednesday, May 23, 2012

Product Review: Shea Moisture Curl and Style Conditioning Milk

I keep winning when it comes to my product junky purchases lately. It at least makes my addiction to buying natural hair products worth it in the end!

I grabbed a bottle of Shea Moisture's Curl and Style Conditioning Milk last weekend. After deep conditioning my hair, I applied my leave in conditioner (currently using lacio lacio leave in conditioner) to damp hair. After applying my leave in to my sectioned hair, I squeezed about a nickel sized amount of the Shea Moisture Curl and Style Conditioning Milk and applied this to the sections. I followed up with my essential oils and twisted the sections. I sealed my ends with the Jane Carter Nourish and Shine  (love this stuff!)

Here's a little snap shot of my results. I will have much better results coming soon from my SLR, these were unfortunately captured with my crappy HTC Evo camera.


Wednesday, May 16, 2012

Jane Carter's Nourish and Shine Review


Haven't been doing much with my hair lately. Really really trying to stick to my protective styles. I've been rocking two weeks of buns. Trying to remix the buns a little on the weekend with a pompadour or hair accessories.

All this protective styling, deep conditioning, moisturizing, sealing, baggying, etc. better pay off!

Oh...onto the review!

Jane Carter's Nourish and Shine Review:

Now I know that I mentioned this product in my previous post. I want to mention that I am not using the product as a moisturizer, as I previously stated. In doing my research, I realized that "butters" (such as Nourish & Shine which includes Mango Butter and Shea Butter) are generally not use as moisturizers. Moisturizers are generally products that are water-based. There are some people that prefer to use Butters as a moisturizer, but I find that my hair moisturizes better with water based products.

Currently, I am using the product as a sealer. I am using QP Mango Butter as my moisturizer and using the nourish and shine as my sealer. I love using these products together because they may my hair feel extremely soft. After not washing my hair for a week and wearing it in buns, I kept delaying washing my hair because I LOVED how soft my hair felt.

Product Grade: A (would've gotten an A+ if it wasn't for the smell...bleh!)

Below is a picture of my hair in a braidout done two weeks ago using the Nourish and Shine....


Later Chicas!

Thursday, May 3, 2012

In My Bag


Referring to my ends of course! I have been feeling like my growth has become stagnant....feels like I have been stuck at the same length for far too long. The reality is that retention helps with hair growth and I believe retention is my problem.  I have decided to become more determined than ever on my hair journey. I'm stepping up my 'hair game' a notch.

This includes:

More Deep Conditioning!
More Protective Styling!
Bare Minimum Amounts of Heat!
annnnnnnd
'Baggying' my ends at least 5x a week!

I am currently using Jane Carter's Nourish and Shine (review coming soon!) and African Pride's Hair Scalp and Skin Oil on my ends. I'm not going to do any length checks until the end of the summer. Hopefully these interventions will help!


Sunday, April 1, 2012

Oh My Color!

I had a major color disaster last Saturday. I have been desiring a little bit of color, but nothing extreme. So I decided to dye the top U-Shaped portion of my hair a honey blonde color. I used Clairol Textures and Tones:


The color on the box looked perfect! I even looked at the color comparison chart on the side of the box. It seemed to be the perfect match. Of course I also did my research on blogs, on youtube, and on the forums. This actual brand even tested as a top performer in Consumer Reports comparison tests. 

I followed the directions, mixed the bottles and packet together. And...


What a disaster!! Instead of the "honey blonde" I was expecting, I was left with an orange sherbet/carrot top blend. I almost had a nervous breakdown. I couldn't go to work or in public looking like this. Out of desperation, the next morning I went to the Hair Cuttery to get the messy dye job fixed. 
Thankfully they were able to work a miracle on my disaster work. While there, I also received a trim and a wash/curl.


Lesson Learned! Never try an at-home dye job ever again!

I still have my eye on that honey blonde color though...

Have you ever had a natural hair disaster? What did you do to overcome it (or did you simply live with it?)

Wednesday, March 7, 2012

This is me.

No product. Freshly washed. Loving and embracing my natural.


Oh...and the bangs are here! :P

Thursday, February 23, 2012

Neem Powder/Oil


About two weeks ago, I was browsing some items in my local Indian store. I picked up a box of Neem Powder (thinking it was Alma powder....apparently I can't read) and picked up a bottle of Neem oil. I have wanted to try some other products in the Indian store other than Henna and I thought I would do some experimenting.

Once I got home, I began to research the products more. I usually do this before making my purchase, but since my visit to the Indian store was random, I didn't have the chance to. I discovered that the Neem Tree is has a reputation as being the "wonder tree". It has been used in the past and even in the present to treat various illnesses and it is also used as preventative care. For hair, it is usually used to treat dandruff. I don't have a problem with dandruff, but I thought that was interesting. In general, it is used to promote hair health. 

Finally I opened up my new products. I kind of felt like a kid playing with new toys. Until I caught a whiff of the Neem Oil.

Damn near passed out.

Talk about stank. Wheeeweeee!

Nevertheless, I began mixing a concoction of Neem Powder, Conditioner, and Neem Oil. I applied it to my hair. Though I must have walked around the house smelling rather interesting, I kept it in for a half hour.


Washing it out was quite an experience. Not as bad as washing out Henna. But this stuff looks like a paste once it goes on, so it's not like washing out conditioner. Though the smell lingered for day or two (I think I used too much Neem Oil)...I loved the way that it made my hair feel. It made it feel soft and strong. I think I will be using this once or twice a month as a deep deeeep conditioner.

The next product on my "Indian Store Wish List" is the Shikakai Powder. Stay tuned!

Tuesday, January 3, 2012

Fresh Start To The New Year: Roller Setting Challenge!!

I'm so excited, I have signed up for my first "challenge" as a blogger. (I usually sign up for challenges on longhaircareforum.com.) It's so funny that I stumbled across this one. I have recently become interested in roller setting again and was trying to google the 2012 roller setting challenge on lhcf in hopes of getting some tips and tricks. I stumbled across Longing 4 Length's blog and discovered that she (EbonyCPrincess) was starting a 6 month long challenge. I emailed her and here I am today.

I have already tried two rollersets in the past week. The first set was done on orange and purple flexirods. I wasn't particularly satisfied with the set. It was a bit frizzy in the back and didn't hardly have any *swang*. This is when I began to do some research online and discovered the error in my first set.

1. My hair was not drenched during the process. I learned that the hair has to be very wet when it goes on the rollers.

2. I don't think my hair likes LottaBody setting lotion. I diluted the mess out of this stuff and it still gave me a blah set.

3. I was not rolling correctly on the roots.

4. I took down the rollers before they were completely dry. Big no-no.

Here are some pictures of that set:


Ahhhh! Oh nooo!! Fuzzy hair!


After dusting myself off and trying again with my new techniques, tips, tricks, and magic...here is my current rollerset:


Don't mind the junk in the background...lol


This is my best rollerset to date.

The products I used:
Cantu Shea Butter Leave-in
Kinky Curly Spiral Spritz
Coconut Oil
Water

The only problem I have with this set (I know...I know, I'm such a perfectionist) is that I used orange and red flexi rods and the coils came out a bit too tight for me. They are gradually loosening up but next time I will definitely stick with the purple rollers in the back and orange rollers in the front!

Monday, December 26, 2011

All wigged out!

I love protective styles that look pretty and protect my hair. For a while I have been seeking using wigs as a method of protective styling. Years ago I used to wear half wigs...but I wasn't a big fan because many of them have a "hump" that makes it hard to blend with my hair. I started researching using lace fronts as type of half wig. 

Meet: Freetress Angela

Her lace is cut along the front and she is placed about an inch or two behind my actual hair. The hair in the front is my own. I brushed my hair over her to cover the beginning part of the wig. I like this idea more than half wigs because the lace fronts lay much flatter, giving a more natural effect. Plus it is very comfortable. This will be my cocktail hour wig.

I'm hoping to find one that matches my natural hair so that I do not have to straighten my hair. The ideal wig would mimic the way my hair looks when it is in a braid out. On my search I go...

You can call me "Elle Kardashian" lol!


Sunday, December 18, 2011

Year End Results...

These pictures mark my progress from January 2011 to December 2011. This is the first year that I have truly embraced being natural. I'm excited, I really didn't think I made much progress this year. I guess I can attribute my results to:

1) Moisturizing and sealing
2) Using Henna
3) Not overusing/abusing heat
4) Deep conditioning weekly
5) Using Low Manipulation and Protective Styling


Soooooooo....Can I officially claim BSL?

Monday, December 12, 2011

Kimmaytube's Leave-In Conditioner

Eureka! I have found a new staple!

I don't quite know what inspired me to try the Kimmaytube Leave-In Mix but I tried it out about two weeks ago. My braidout results were amazing. Fluffy but not frizzy. Defined. Curly on the ends. I thought to myself "no, maybe that's not it"...but it was the only new addition to my hair routine. I tried it again this weekend and scored another great braidout. So I am attributing this success to the Kimmaytube Leave-In.

The thing that I love about this leave-in is that it includes one of my favorite leave-ins: Kinky Curly Knot Today. And the rest of the recipe is below:


Recipe:

2 tablespoons of Knot Today Leave-In


2 tablespoons of Aloe Vera Juice with (pH 4.0 or 4.5)


2 teaspoons of Castor Oil


2 teaspoons of Another Oil (I tried Hot 6 Oil with my first batch, Alma Lite Oil with my second batch...came out the same. Some people use Jojoba Oil.)


*I make sure to put the mix in the fridge when I am done using it. I have been reading that Aloe Vera can spoil at room temperature and I didn't want to take my chances....